Creating Your First Campaign
Campaigns are the heart of EvangeGo. They help you organize your outreach efforts by location and track your progress over time.
Step 1: Navigate to the Map
Click Map in the sidebar to open the interactive map view.
Step 2: Enter Campaign Details
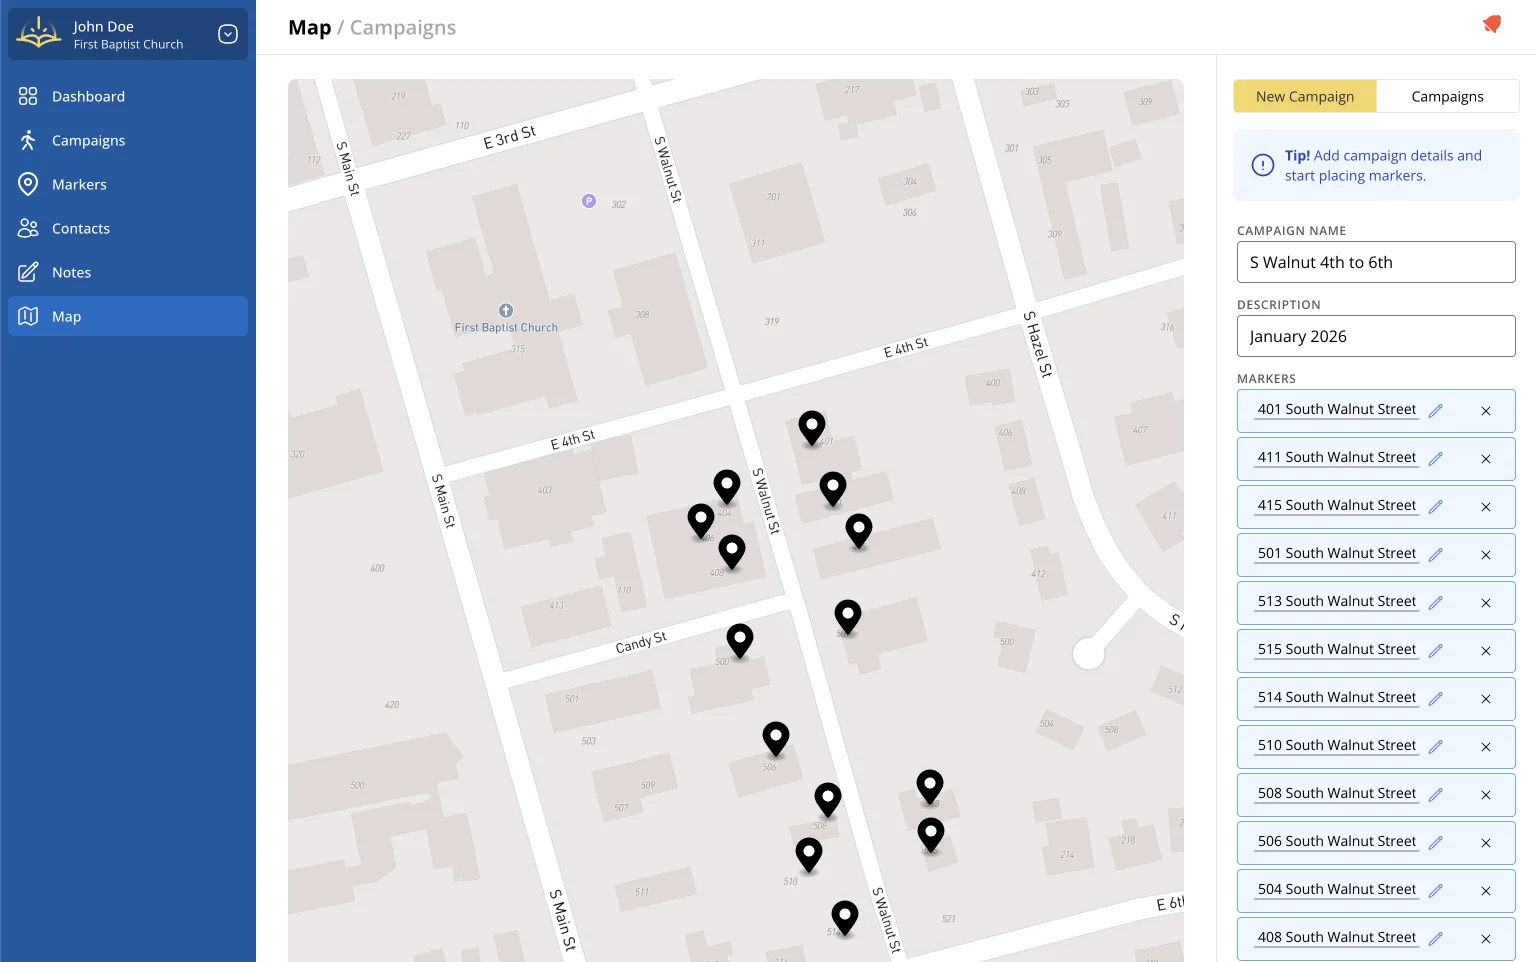
Click the New Campaign button in the upper-right hand corner of the screen. Next you will enter a descriptive name for your campaign (e.g., "Oak Street Neighborhood - January 2024").
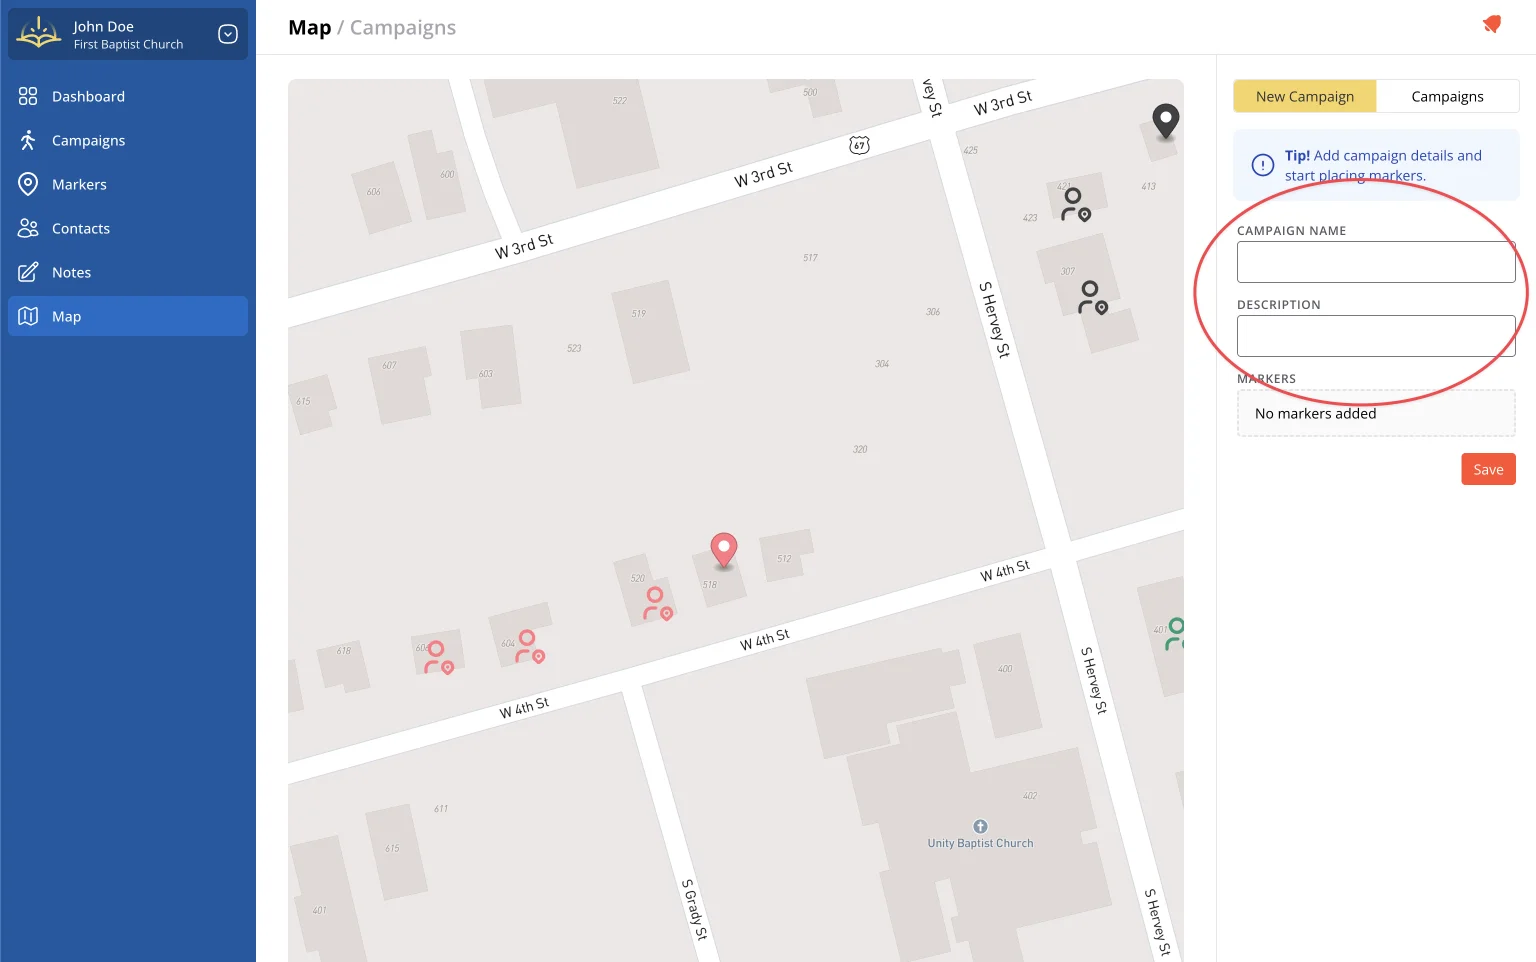
Step 3: Add Markers for Each Stop
Click anywhere within the map to drop markers. Each marker represents a residence or location you plan to visit. Marker addresses are auto-populated as the marker title, but you are free to rename them to anything you like.
Step 4: Save the Campaign
Once you've added all your markers, click Save Campaign to finalize your setup.
Step 5: Review, Update, or Print
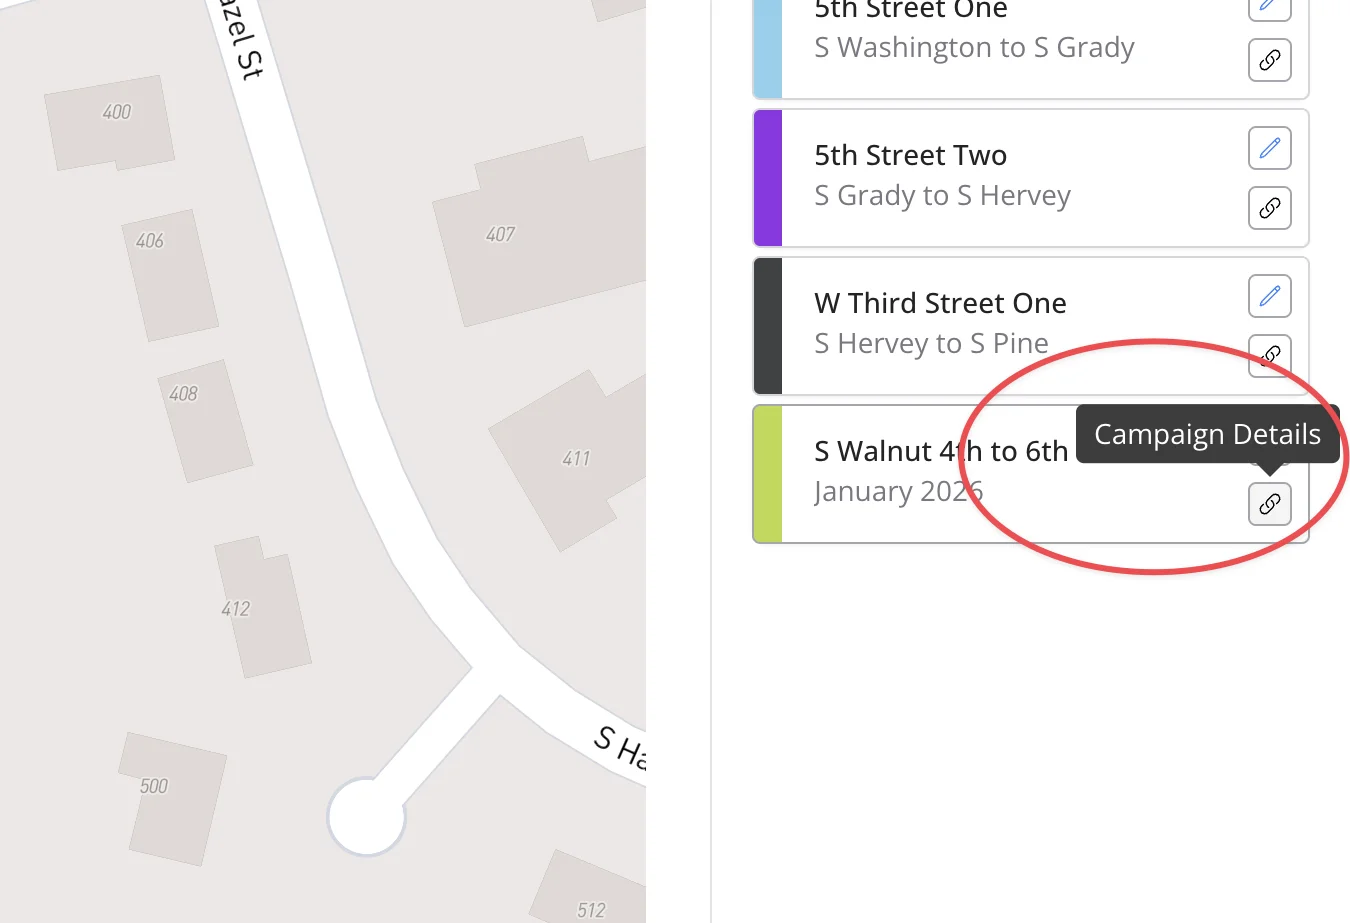
Access the campaign details page by either:
- Clicking the 'campaign details' button on the campaign card in the right sidebar.
- Click on 'campaigns' in the left sidebar, then click on the campaign you just created.
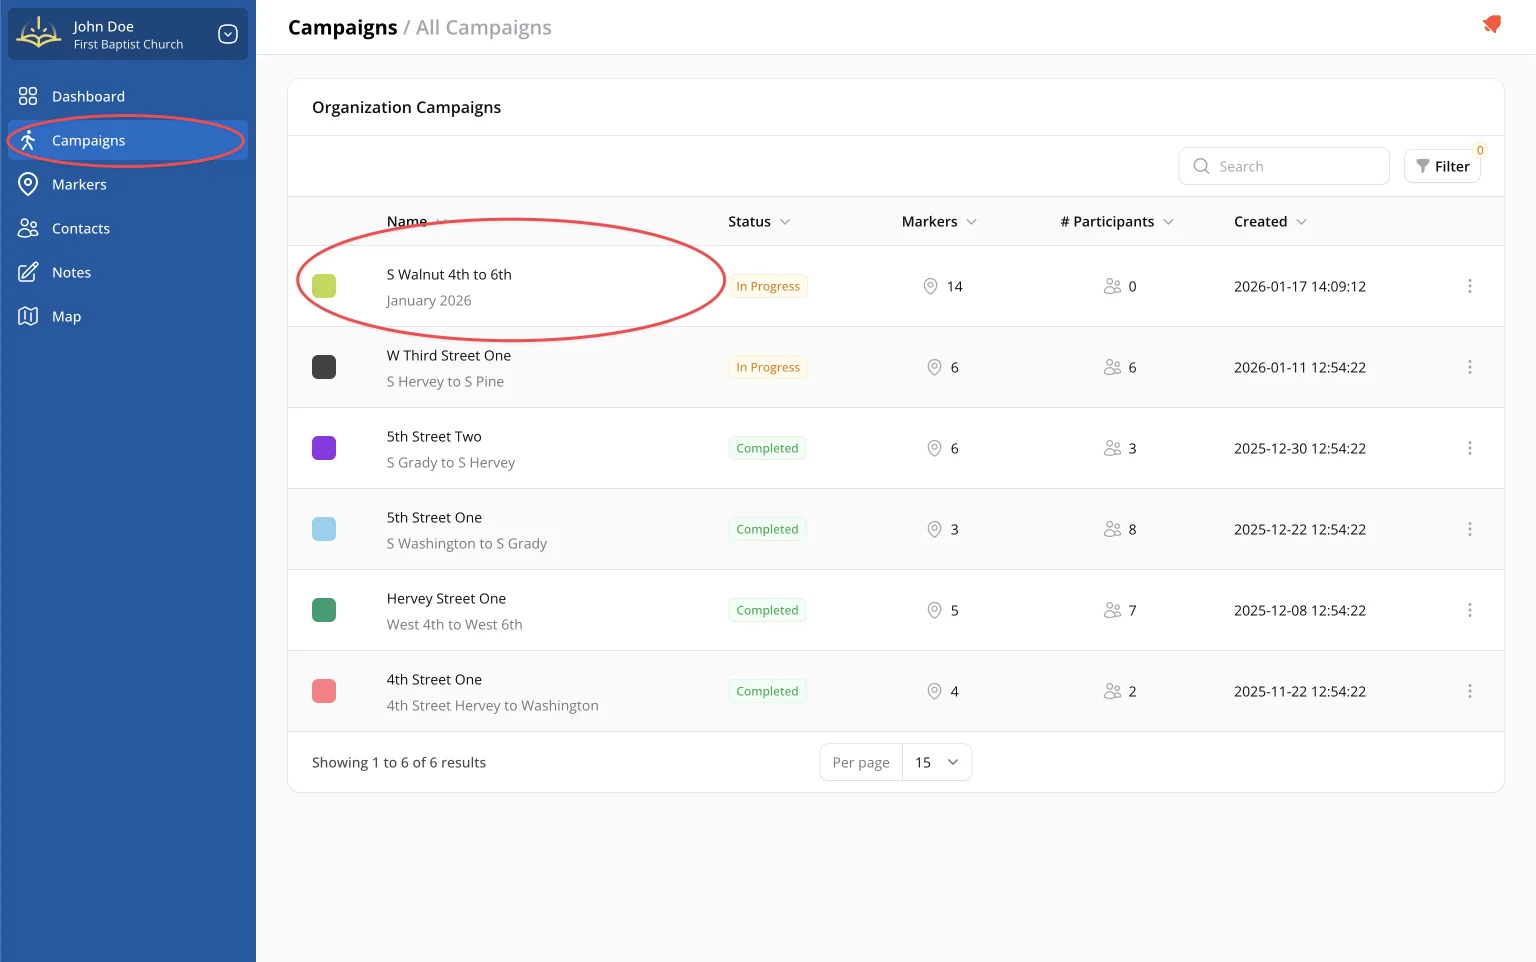
From the campaign details screen, you can:
- Update campaign details
- Review your progress and marker statuses
- Update visit information as you canvass
- Print a PDF for use in the field
- Create contacts from markers
- Add notes to a marker